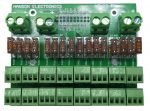
Description
Features
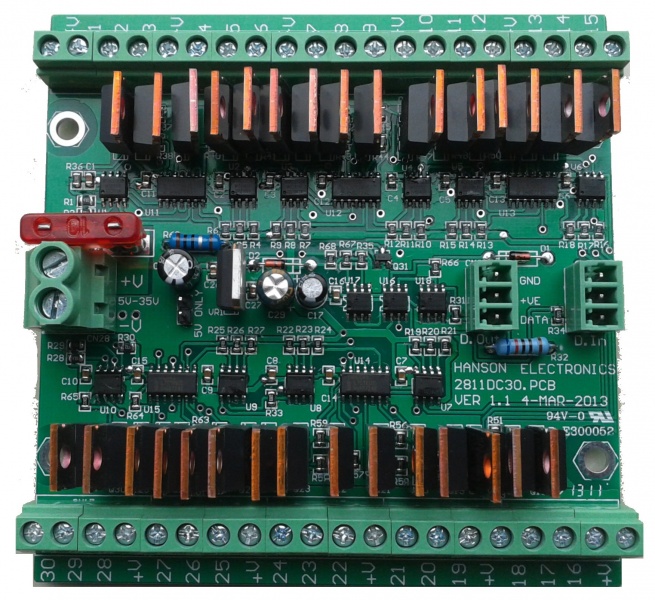
-DC input (5V – 35V) (large screw terminals) -30A ATO (automotive) blade fuse maximum size. (10A supplied) -3A per channel. 30A maximum per board -Common anode (positive) configuration. -Output terminals arranged as V+, Ch, Ch, Ch (particularly suits RGB) -Electrically isolated input. 3 pin pixel data input and data output plugs isolated from DC dimmer circuitry
DC Input
The large 2 way green connector is the DC inputs from your power supply. The +V terminal is positive and the -V terminal is negative or ground. Any DC voltage in the range of 5V to 35V can be used. There is a standard ATO (automotive) fuse adjacent to the power terminals. The board comes supplied with a10A fuse fitted. Fuses up to 30A can be used. It is recommended changing the fuse to the closest size for the total current that the board is controlling.
Fuse
One fuse protects the dimmer circuitry. The pcb is supplied with a 10A ATO automotive style fuse. This fuse can be replaced with a smaller or larger capacity 1 to suit the application. A maximum of a 30A fuse can be installed.
Channel Outputs
There are 30 channel outputs. The maximum load per channel is 3 Amps, but the overall limit is 30 Amps. This means that you can’t turn on all 15 outputs with the maximum load. In reality, this should not be a problem as most loads will be less than 2 Amps. Each group of 3 outputs is grouped into 4 terminals. These are the 3 outputs and a common positive. RGB lights with a single common anode should have the common wire connected to the terminal +V and the red, green and blue wires to channels 1,2,3 (or 4,5,6 etc). The order and specific channels is actually dependant on what is configured in your sequencing software. For lights that have single colours (or single channels) per pair of wires then 1 wire gets connected to the +V and 1 gets connected to the channel output. For led lights which require the polarity to be around the right way then the anode (positive) gets connected to +V and the cathode (negative) goes to the channel. For lights that do not have three channels commoned then 3 wires will be joined and fitted to the +V for the 3 channels.
SPI Data Input and Output
The pcb has 2 terminals blocks for getting the SPI / pixel data into and out of the pcb. These are removable screw terminals and the wire that goes into each position is marked on the pcb. The data into the pcb comes in via the D.In terminal and data out to other boards or pixels goes out the D.Out terminals. The 3 terminals are GND, +VE and Data
5V Jumper
There is a jumper on the pcb that is ONLY to be installed if the power supplying the pcb for the DC dimmer section is 5V. If this jumper is installed and ANY voltage higher than 5.1V is applied to the power terminals then damage to the board will result. If the jumper isn’t installed and the board is powered by 5V then unpredictable lighting and no data output will occur.
Note: the two 3 pin connectors for pixel data in/out aren’t shown in the photo but are supplied.
Dimensions 100mm x 100mm
A power supply, an E1.31 to pixel bridge outputting 2811 data and a computer (or Raspberry Pi running FPP) is what is needed to control Christmas lights. See manual for connection examples.
User Manual
2811DC user manual 1.2
Jeff from Canispater Christmas did a video on the 2811DC15

